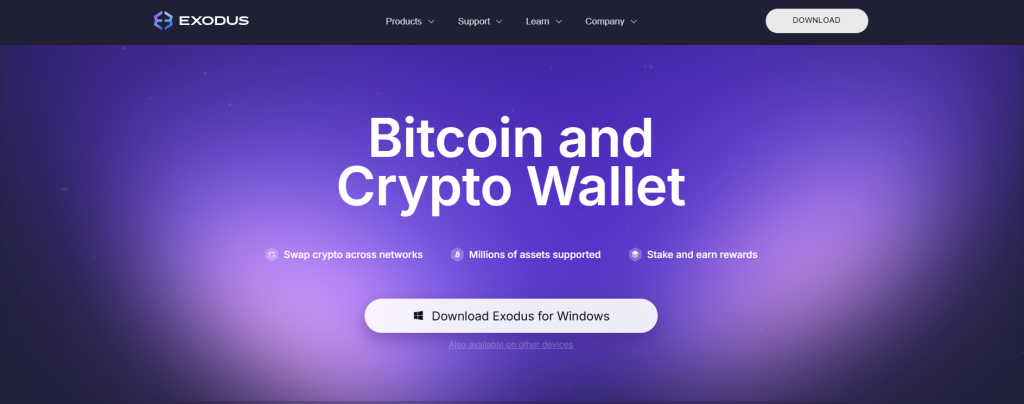


Exodus Wallet
Execute your crypto strategy with ease
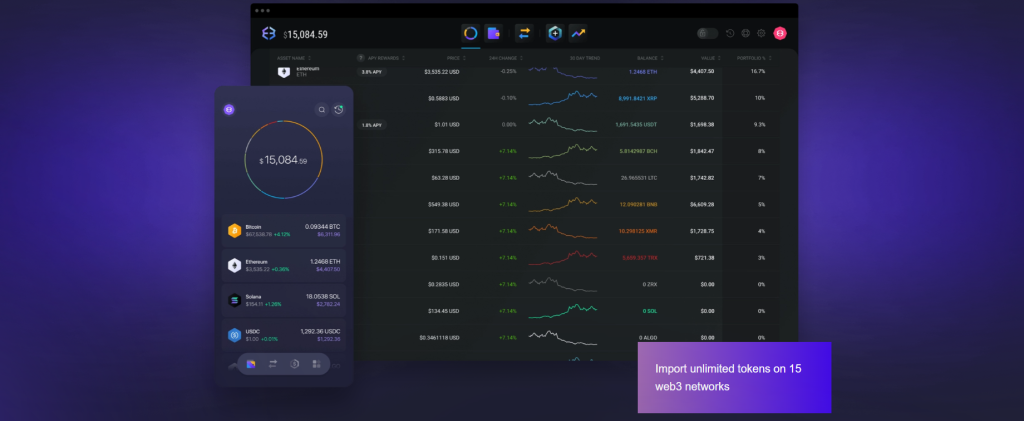
Effortlessly swap between thousands of trading pairson mobile, desktop, and web browsers

Exodus Wallet: Easy and Reliable Crypto
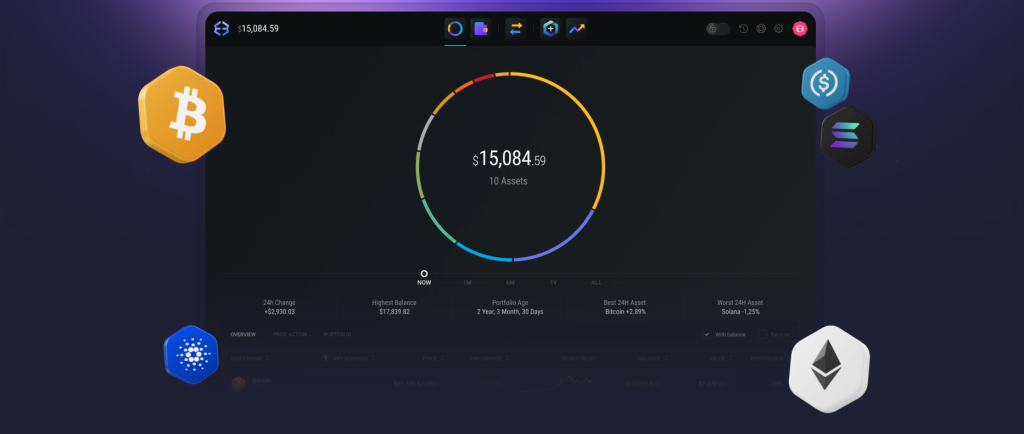
Exodus is a cross-currency cryptocurrency wallet known for its user-friendliness, sleek interface and encrypted safety. The design was created, keeping in mind easy accessibility without compromising the security of the user. The user can send, trade, receive, hold and manage the cryptocurrencies irrespective of the centralized exchange.
Crypto made easy and safeguarded
Exodus is a multi-currency crypto wallet created to ensure security, safety and easy accessibility. It was created keeping in mind that beginners in the world of cryptocurrency, hence offers easy-to-use, simple steps while maintaining top-notch encryption. It allows the user to trade multiple cryptocurrencies without having to go through the hassle of some centralized transfers. Regardless of the experience of the user in the crypto world, it offers a hassle-free, smooth experience without the user encountering difficult technical crypto terms.
Disclaimer
This website this just for information purpose all rights are reserved to Exodus Movement Inc.\
Getting started with Exodus Web3 Wallet
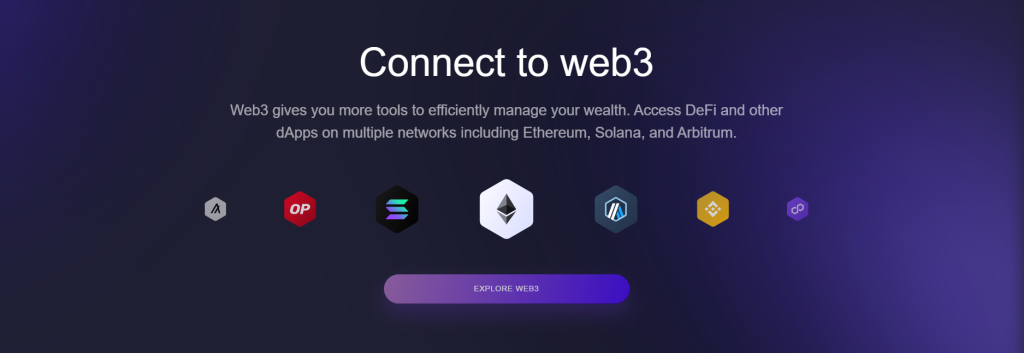
Connect to dApps and web3 apps with the Exodus browser extension wallet. Exodus Web3 Wallet connects you to dApps, DeFi, and all web3.
Updated over 9 months ago
Everything you need to know about Exodus Web3 Wallet! You can download Exodus Web3 Wallet here.
In this article:
- What is Exodus Web3 Wallet?
- What are dApps and web3 apps?
- Which networks and tokens does Exodus Web3 Wallet support?
- Which browsers support Exodus Web3 Wallet?
- How do I install and set up Exodus Web3 Wallet?
- How do I use Exodus Web3 Wallet?
- I lost access to my Web3 Wallet! How can I recover it?
Lee este artículo en Español | Read this article in Spanish
What is Exodus Web3 Wallet?
Exodus Web3 Wallet is a browser extension wallet that allows you to connect to dApps, web3 apps, DeFi, and all of web3.
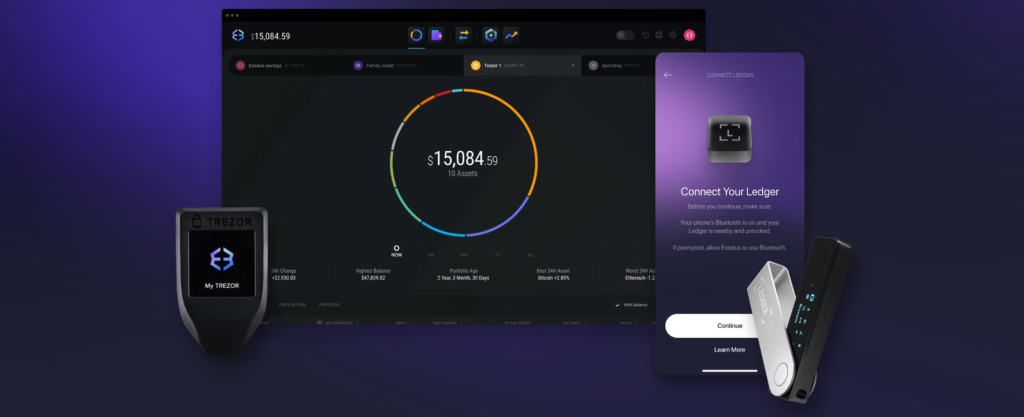
Like Exodus Mobile and Exodus Desktop, Exodus Web3 Wallet is a self-custody crypto wallet.
As well as connecting to dApps, with Exodus Web3 Wallet, you can send, receive, swap crypto, and interact with NFTs, on all supported networks.
Video tutorial: Get started with Exodus Web3 Wallet
What are dApps and web3 apps?
The word dApp is an abbreviation of decentralized application. DApps are apps that you interact with by using blockchain technology. There are many different kinds of dApps, from games to DeFi to NFT platforms.
A web3 app is any application built on a blockchain. There are many different kinds of web3 apps.
All dApps are web3 apps, but not all web3 apps are dApps, because not all web3 apps are decentralized. However, you’ll often find the terms used interchangeably. You can connect to dApps and web3 apps with a crypto wallet like Exodus Web3 Wallet.
Web3 is the World Wide Web of the crypto-sphere, and Exodus Web3 Wallet is your doorway to web3 and beyond.
With Exodus Web3 Wallet, you can connect to web3 apps on any of the supported networks.
If you would like to learn more about dApps, web3 apps, and DeFi, you can explore:
- What are dApps and web3 apps?
- What is DeFi?
- How do I connect to web3 apps with Exodus Web3 Wallet?
- Safety and security when using DeFi and dApps
Which networks and tokens does Exodus Web3 Wallet support?
Currently, Exodus Web3 Wallet supports the following networks:
| BitcoinEthereumSolanaAlgorandArbitrum NovaArbitrum OneAuroraAvalanche C-Chain | BaseBNB Smart ChainCardanoFantomFlareOptimismPolygonRootstock |
The Aurora, Base, Flare, and Rootstock networks have light support in Exodus, so only send transactions for assets on these networks will display in your wallet. Your balance will be accurately reflected. To view your full transaction history, visit the Aurora, Base, Flare, or Rootstock block explorer and search for your address.
You can find out more here: Networks with light support.
You can also add custom tokens on networks that support them. Learn how by visiting this guide: How do I add a custom token?
If you import an existing wallet into Exodus Web3 Wallet, you will only see assets on supported networks. Note that whenever possible, it’s safer to send crypto as a regular transaction. If you have assets on other networks, you can continue to access them in Exodus Mobile or Desktop.
Which browsers support Exodus Web3 Wallet?
Exodus Web3 Wallet is a Chrome-based extension. You can install it on Google Chrome or Brave.
How do I install and set up Exodus Web3 Wallet?
To get started with Exodus Web3 Wallet, you first need to install the extension on a supported browser: How do I install Exodus Web3 Wallet?
After installing Web3 Wallet, you have two options to set it up. You can create a new wallet, or, if you already have an Exodus, Phantom, or MetaMask wallet, you can restore with its 12-word secret recovery phrase.
Be aware that Exodus will only restore addresses from Phantom or MetaMask with previous transaction history. If there is no previous history, new addresses will be created.
We recommend that you create a new wallet because it makes it a little safer to interact with dApps and web3 apps. To learn more about protecting your assets while connecting to third-party apps, read our article: Safety and security for DeFi and web3.
If you create a new wallet, make sure that you write down your secret recovery phrase. Backing up your wallet is essential to keep your funds safe and accessible. For more information, you can jump to: How do I back up my Web3 Wallet so I always have access to it?
Create a new wallet
Here is how you can create a new Web3 Wallet.
- After installing Exodus Web3 Wallet, a) click Create New Wallet. If you’re new to using Exodus Web3 Wallet, you can b) click Take the Tour to get a brief overview of the wallet’s features.
- When prompted to create a password, a) type in a strong password. b) Your wallet will indicate the strength of your password with the color of the bar under the password, with red and yellow being the weakest and green being the strongest. c) Passwords are case-sensitive, so you will see a prompt if caps lock is on.
- After entering a strong password, a) the bar below the password will be green. When you are done creating your password, click Next.
- a) Re-enter your password. When the passwords match, you’ll have the option to b) click Get Started.
- a) Read the Terms and Privacy Policy. To open your new Exodus Web3 Wallet, b) click Continue. Pin your Web3 Wallet to your browser for quick access: How do I pin Web3 Wallet to my browser toolbar?
- You have now successfully created your new Web3 Wallet! Make sure you write down your 12-word secret recovery phrase: How do I back up my wallet and write down my 12-word secret recovery phrase?
Exodus will be set as your default wallet. This can be helpful when connecting to dApps and web3 apps. To learn more, visit: How do I connect to a web3 app if Exodus isn’t on the list?
For more information on how to use your new wallet, visit: How do I use Exodus Web3 Wallet?
I have a wallet – restore an existing wallet
You also have the option to sync your existing Exodus wallet with your Web3 Wallet. If you restore a wallet with your 12-word secret recovery phrase, only assets on supported networks will be shown in Web3 Wallet.
If you have the choice between importing your secret recovery phrase or sending your crypto, we recommend always sending your crypto as a regular transaction.
We also recommend creating a new wallet for Exodus Web3 Wallet, because it makes it a little safer to interact with dApps and web3 apps. To learn more about protecting your assets while connecting to third-party apps, read our article: Safety and security for DeFi and web3.
Exodus Web3 Wallet supports secret recovery phrases generated by Exodus, Phantom, and MetaMask. However, Exodus will only restore addresses from Phantom or MetaMask with previous transaction history. If there is no prior history, new addresses will be created.
- After installing Exodus Web3 Wallet, a) click I Have a Wallet. If you’re new to using Exodus Web3 Wallet, you can b) click Take the Tour to get a brief overview of the wallet’s features.
- a) Carefully enter each word individually from your secret recovery phrase, then b) click Restore. Your 12-word secret recovery phrase controls access to your funds, so it is very important to keep it secret. Anyone with your secret recovery phrase can steal your crypto, so please don’t share it with anyone, including Exodus Support!
- When prompted to create a password, a) type in a strong password. b) Your wallet will indicate the strength of your password with the color of the bar under the password, with red and yellow being the weakest and green being the strongest. c) Passwords are case-sensitive, so you will see a prompt if caps lock is on.
- After entering a strong password, a) the bar below the password will be green. When you are done creating your password, click Next.
- a) Re-enter your password. When the passwords match, you’ll have the option to b) click Restore.
- Next, a) read the Terms and Privacy Policy, then open your restored Web3 Wallet by b) clicking Continue. Exodus will automatically be set as your default wallet. Having Exodus as your default browser can be helpful when connecting to web3 apps. To learn more, visit: How do I connect to a web3 app if Exodus isn’t on the list?
- Your wallet is now restored in Exodus Web3 Wallet. Review your synced assets, then click OK. Pin your Web3 Wallet to your browser for quick access: How do I pin Web3 Wallet to my browser toolbar?
For more information on how to use your new wallet, jump to: How do I use the Web3 Wallet?
How do I back up my Web3 Wallet so I always have access to it?
It is very important that you back up your wallet by writing down your 12-word secret recovery phrase. The secret recovery phrase is the only way to restore your funds on another device if your device is lost or stolen.